How to Take off Acrylic Nails With Vinegar
You can remove acrylic nails with vinegar by soaking them in a mixture of equal parts white vinegar and warm water for 30-40 minutes to gently soften the acrylic. This natural method helps break down the acrylic without harsh chemicals.
For best results, wrap cotton balls soaked in the vinegar solution around your nails and cover them with foil. This keeps the solution in place and enhances the softening process.
Avoid forcing or peeling off the acrylic to prevent damage to your natural nails. After the acrylic has softened, carefully lift it using a cuticle pusher.
Once removed, be sure to moisturize your nails and cuticles to restore hydration. If you want to guarantee safe removal and proper care, there’s more helpful guidance ahead.
Key Takeaways
- Soak cotton balls in equal parts white vinegar and warm water, then apply to nails and wrap with foil for 30-40 minutes to soften acrylic.
- Gently test acrylic softness with a cuticle pusher and carefully lift without forcing to avoid damaging natural nails.
- Apply petroleum jelly or cuticle oil around nails before soaking to protect cuticles from irritation.
- After removal, moisturize nails and cuticles with oil or cream to restore hydration and prevent dryness.
- Avoid over-soaking or peeling acrylics to prevent nail brittleness, irritation, and infection risks.
Understanding Acrylic Nails and Their Composition
Although acrylic nails have become a popular beauty enhancement, they were originally developed as a medical treatment for damaged nails. Acrylic is made by combining a liquid monomer with a powder polymer, which hardens into a durable, artificial nail extension. This strong bond is created using adhesives that attach the acrylic to your natural nails, forming a smooth, glossy surface perfect for nail art.
However, this chemical composition includes substances like methyl methacrylate or ethyl methacrylate, which require careful handling. When it comes to acrylic removal, you need to understand that improper techniques can damage your natural nail bed. That’s why it’s important to choose safe methods, like soaking in acetone or vinegar solutions, to gently break down the acrylic without causing harm.
Knowing the basic makeup of acrylic nails helps you appreciate why proper removal is so vital for maintaining healthy nails under those stylish extensions.
Why Proper Removal of Acrylic Nails Matters
Understanding what acrylic nails are made of highlights why you should be careful when removing them. These nails are bonded with strong adhesives that, if removed improperly, can damage your natural nail bed. Proper nail care during removal is essential to avoid microabrasions and infections that can arise from harsh or aggressive techniques.
When you rush or peel acrylics off, you risk thinning and weakening your natural nails, making them brittle and prone to breakage. Taking the time to remove acrylic nails gently helps minimize inflammation, redness, and irritation around your cuticles and surrounding skin. Using safe methods supports the health of your nails and promotes healthy growth afterward.
How Vinegar Helps in Acrylic Nail Removal
You can use vinegar’s acetic acid to gently weaken the adhesive holding your acrylic nails in place. Mixing vinegar with water creates a mild solution that helps soften the acrylic, making removal easier.
Just remember to soak your nails patiently and follow safe application tips to avoid damage.
Vinegar’s Chemical Properties
Because vinegar contains acetic acid, it can help break down the adhesive holding your acrylic nails in place. This acid gently dissolves some chemical bonds, loosening the acrylic without harming your natural nails. Vinegar’s pH of about 2.5 contributes to this effect, making it effective yet mild.
When diluted with water, vinegar’s acidity softens the acrylic while reducing irritation risks. Here’s a quick look at vinegar’s key chemical properties that assist in acrylic nail removal:
| Property | Effect on Acrylic Nails |
|---|---|
| Acetic Acid | Breaks down adhesive bonds |
| pH Level (~2.5) | Provides mild acidity for loosening |
| Dilution | Softens acrylic, reduces irritation |
| Mild Acidity | Helps dissolve nail surface bonds |
Understanding these helps you safely use vinegar for gentle acrylic removal.
Acrylic Softening Effects
Although vinegar isn’t as strong as acetone, its acidity helps soften acrylic nails by breaking down the adhesive bonds and some of the acrylic material itself. This acrylic softening effect makes it easier to loosen the nails without harsh chemicals. When you soak your nails in a vinegar-water mixture, the acetic acid gradually dissolves parts of the acrylic, reducing the need for aggressive scraping or filing.
While the process takes longer compared to acetone, these acrylic softening effects help protect your natural nails from damage. Regular vinegar soaking gently weakens the bond between acrylic and natural nails, allowing for a safer, less abrasive removal. So, if you’re aiming for a gentler method, vinegar’s mild acidity is a helpful alternative to strong chemical removers.
Safe Application Tips
When soaking your nails in a vinegar-water mixture, it’s important to guarantee the solution fully covers each nail to maximize the softening effect. Vinegar’s acetic acid gently breaks down the adhesive, making acrylic removal safer and easier.
Here are some safe application tips to keep in mind:
- Use equal parts white distilled vinegar and warm water to create an effective soaking solution.
- Soak your nails for 30-40 minutes, ensuring the mixture stays in contact with all acrylic surfaces.
- After soaking, gently push off the softened acrylic with a cuticle pusher instead of forcing it, reducing damage to your natural nails.
Following these safe application tips helps you remove acrylics naturally while protecting your nail health.
Preparing Your Nails for Vinegar Treatment
Before you begin the vinegar treatment, make sure to trim your acrylic nails as short as possible to minimize the material that needs dissolving. This step helps speed up the removal process and reduces soaking time.
Next, gently file the surface of your acrylic nails to create a rough texture. This will allow the vinegar solution to absorb better and work more effectively. To prepare your nails for soaking, mix equal parts of white vinegar and warm water in a bowl large enough to submerge your fingertips.
Soak cotton balls in this solution and place one on each nail, ensuring the entire acrylic surface is covered. Secure the cotton balls by wrapping each finger with aluminum foil or using nail clips. This setup will keep the vinegar in contact with your nails and maximize the treatment’s effectiveness.
Properly preparing your nails ensures the vinegar can penetrate and soften the acrylic efficiently.
Step-By-Step Guide to Removing Acrylic Nails With Vinegar
Since you’ve prepped your nails properly, you’re ready to start the vinegar removal process. For effective acrylic nail removal, follow these simple steps carefully.
- Soak cotton balls in a mixture of equal parts vinegar and warm water. Then, place each soaked cotton ball on your nails and wrap them tightly with aluminum foil. This helps keep the vinegar solution in contact with the acrylic.
- Let your nails soak for about 30-40 minutes. This will loosen the acrylic adhesive and soften the acrylic material, making it easier to remove.
- Remove the foil and cotton gently. Use a cuticle pusher or wooden stick to carefully lift and peel away the softened acrylic. Avoid forcing it off to prevent damage.
Afterward, don’t forget to moisturize with cuticle oil or hand cream to keep your nails hydrated post-acrylic nail removal. This natural method lets you soak your nails safely and effectively.
Alternative Household Methods to Remove Acrylic Nails
If vinegar isn’t quite doing the trick for you, there are other household options you can try to remove acrylic nails gently at home. Soaking your nails in warm, soapy water can help soften the acrylic, making it easier to lift.
Another method is using lemon juice mixed with water, which acts similarly to vinegar by weakening the adhesive bonds. You can also try oil treatments like olive or coconut oil to gently loosen the edges of the acrylic nails.
| Method | How it Works | Soaking Time |
|---|---|---|
| Warm Soapy Water | Softens acrylic for easy removal | 30-40 minutes |
| Lemon Juice Mix | Acidic properties weaken glue | 30-40 minutes |
| Oil Treatment | Loosens edges and moisturizes | 20-30 minutes |
These alternatives can help you remove nails safely without harsh chemicals, but patience is key to avoid damage.
Tips to Minimize Damage During the Removal Process
To minimize damage when removing acrylic nails, you’ll want to soak them gently using a vinegar-water mixture and protect your cuticles with petroleum jelly or oil. Taking your time to gradually soften the acrylic prevents harsh peeling or tearing.
These simple steps help keep your natural nails healthy throughout the process.
Gentle Soaking Techniques
While acrylic nails can be stubborn, soaking them gently in a vinegar-water mixture for 30 to 40 minutes can help loosen the acrylic without harsh chemicals. To minimize damage during soaking, follow these steps:
- Mix equal parts warm vinegar and water to avoid drying or irritating your skin.
- Soak cotton balls in the mixture, place one on each nail, and wrap with aluminum foil to ensure even soaking and reduce mess.
- After soaking, gently test the acrylic’s lift with a cuticle pusher—never force it off to prevent nail damage.
Protecting Cuticles Effectively
Because your cuticles are sensitive, taking steps to protect them during acrylic nail removal is essential. Before soaking, apply petroleum jelly or cuticle oil around the nails to shield the skin surrounding them from dryness. Use a vinegar-water soak for 30-40 minutes to soften acrylics gently, then carefully push back softened acrylics with non-metallic tools.
Avoid forceful prying to prevent tears or infections. After removal, moisturize the skin surrounding your nails with cuticle oil to restore hydration and soothe irritation.
| Step | Action | Purpose |
|---|---|---|
| Pre-soak | Apply petroleum jelly | Protect skin surrounding cuticles |
| Soaking | Vinegar-water mixture | Softens acrylic, minimizes harshness |
| Acrylic removal | Use wooden/plastic tools | Prevents cuticle damage |
| Post-removal care | Moisturize cuticles | Restores hydration, reduces irritation |
Gradual Acrylic Softening
Although it might be tempting to speed up acrylic removal, taking your time to gradually soften the nails is essential for protecting your natural nails. Gradual acrylic softening helps weaken the acrylic bonds gently, reducing damage risks.
To do this effectively, soak your nails in warm, soapy water first to loosen the acrylic. Follow with a 30-40 minute soak in a vinegar-water mixture to gradually soften the acrylic. Regularly check softness by gently testing with a cuticle pusher, avoiding forceful lifting.
This gradual acrylic softening approach prevents microtears and peeling by minimizing the need for harsh scraping or pulling. Patience during this process ensures your natural nails stay healthy and intact throughout removal.
Protecting and Caring for Your Natural Nails After Removal
Once you’ve removed your acrylic nails, it’s essential to focus on nourishing and protecting your natural nails to help them recover. After taking off acrylics, your nails without proper care can become dry, brittle, or weak. To prevent this, hydrate your nails and cuticles daily with nourishing oils or hand creams.
Avoid harsh chemicals and nail polish for at least a week, giving your nails time to breathe and regain strength. Using a strengthening base coat or nail hardener during this recovery period supports natural growth and reduces breakage.
Keep your nails trimmed and filed regularly to maintain a healthy shape and minimize the risk of snagging or splitting. Additionally, a balanced diet rich in biotin, vitamins, and minerals plays a crucial role in promoting strong, healthy nails without the damage acrylics can cause.
Common Mistakes to Avoid When Using Vinegar for Acrylic Removal
When using vinegar to remove acrylic nails, be careful not to soak your nails for too long, as this can weaken them.
Make sure you’re using the right type of vinegar, since some varieties may not be effective or could irritate your skin.
Also, avoid forcing the acrylics off—pulling or scraping can seriously damage your natural nails.
Over-soaking Risks
If you soak your nails in vinegar for too long, you risk causing dryness, peeling, and irritation around the nail area. Over-soaking can lead to several issues you should watch out for:
- Damage and Peeling: Prolonged vinegar exposure dries out your natural nails, causing peeling and weakening the nail surface.
- Irritation: The skin surrounding your nails can become inflamed or irritated, increasing discomfort and sensitivity.
- Weakening: Extended soaking disrupts your nails’ pH balance, making them brittle and prone to breakage or microfractures.
To avoid these problems, limit your soaking time and monitor nail condition closely. Over-soaking not only risks damage and irritation but also may reduce the effectiveness of acrylic removal, forcing repeated treatments.
Using Incorrect Vinegar Types
Taking care not to over-soak your nails is just one part of safely removing acrylics with vinegar. When you Remove Acrylic Nails at home, using the wrong vinegar type can cause more harm than good. For example, white or apple cider vinegar, which are high in acidity, can irritate the skin around your nails and damage your natural nails.
Keep in mind that mixing vinegar with other household chemicals or lemon juice makes acrylic removal less effective and may trigger unwanted reactions. Vinegar at room temperature also won’t soften acrylics well, so warming it slightly helps.
If you want to remove your acrylic nails gently at home, vinegar alone isn’t the best tool for the job. Another option is to use acetone properly and a cuticle pusher to perform the removal without damaging nail polish or nails that remain.
Applying Excessive Force
Although it might be tempting to pry off your acrylic nails quickly, applying excessive force can seriously damage your natural nail bed. Forcing your nails off can cause cracks, tears, or even infections.
Here are three reasons to avoid using too much pressure during vinegar removal:
- Prying or yanking can create microabrasions or cuts, increasing infection risk.
- Excessive pressure weakens and peels layers of your natural nail, causing thinning.
- Rushing the process often leads to painful nail damage that takes a long time to heal.
Be patient and gentle when using vinegar to remove acrylic nails. Never peel or force them off, as protecting your natural nail is key to maintaining healthy hands.
When to Seek Professional Help for Acrylic Nail Removal
Whenever you notice severe pain, persistent redness, or swelling during acrylic nail removal, you should seek professional help immediately. These signs may indicate damage or infection that needs expert care.
If your acrylic nails don’t loosen despite your home removal efforts, a nail technician can safely remove them without harming your natural nails. Also, watch for signs of infection like pus or a foul odor—these require prompt evaluation and treatment by a professional.
If you have underlying health issues such as diabetes or immune deficiencies, it’s especially important to consult a professional to avoid complications.
Frequently Asked Questions
What Is the Fastest Way to Remove Acrylic Nails at Home?
The fastest way to remove acrylic nails at home is by using acetone. You’ll want to soak cotton balls in acetone, place them on your nails, and wrap each finger in foil for about 20-30 minutes. This breaks down the acrylic quickly.
Just be sure to moisturize afterward since acetone can be drying. If you prefer a gentler method, vinegar works but takes longer. Patience is key to avoid damaging your natural nails.
How Do I Take off Acrylic Nails Without Acetone?
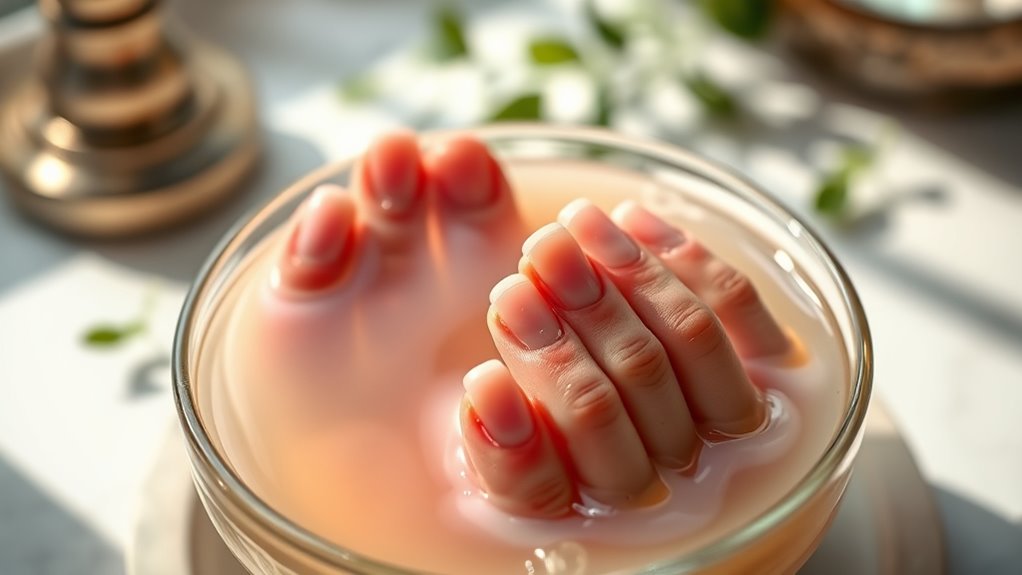
You can remove acrylic nails without acetone by soaking them in warm vinegar mixed with water for about 30-40 minutes. This softens the acrylic, making it easier to gently lift off with a wooden cuticle stick or metal pusher. It takes patience and multiple sessions, so don’t rush.
Afterward, moisturize your nails and cuticles well to keep them healthy and hydrated. Avoid forceful prying to prevent damage.
Can Vinegar Remove Glued on Nails?
Vinegar can be a gentle whisper against the stubborn glue holding your acrylic nails, but it’s not a magic eraser. It might soften the adhesive slightly, making it easier to lift the nails if you’re patient and soak them for a long time.
However, it won’t fully dissolve strong glue on its own. You’ll likely need to combine vinegar with other methods or tools to get those nails off safely.
What Does Soaking Fingernails in White Vinegar Do?
Soaking your fingernails in white vinegar helps break down the adhesive holding acrylic nails in place. The acetic acid in the vinegar softens the glue and the acrylic, making it easier for you to gently lift or remove the nails without damaging your natural nail bed.
It’s a gentler alternative to acetone, especially if you have sensitive skin. Just keep in mind, you might need to soak for a while and use a cuticle pusher to assist removal.
Conclusion
Removing acrylic nails with vinegar is like gently coaxing a butterfly from its cocoon—it takes patience and care to reveal the natural beauty beneath. By treating your nails thoughtfully, you’re nurturing them back to health rather than forcing a quick escape.
Remember, just as a butterfly needs time to spread its wings, your nails need gentle care to shine again. With the right approach, you’ll soon enjoy strong, healthy nails ready to flutter freely.
Using vinegar to take off acrylic nails offers a natural and gentle alternative to harsh chemicals, making it a great choice for maintaining nail health during the removal process.